Food Guilt

So here it is, all ready going into week three of the 20 in 6 challenge. The time sure does get away from a person, especially me it seems! I am down 2 ½ pounds and more than 4 inches! I can hardly believe that I have shrunk FOUR inches! I am all ready able to tell that my pants are feeling a bit looser and my clothes are feeling a bit less snug. It is such a great feeling.

So, let’s talk about food and guilt. I know that it is a bit of a heavy subject, but I completely understand how the two go together for some people and I wanted to talk about it from my perspective. First off, for those of you that know me, you know that vegetables present a real challenge for me because, frankly, I do not enjoy them. Not really at all! However, I know that if I would like to release some of this body clutter that I am carrying around, I know that the best choice for me to eat would be vegetables. And so, I eat them. Every day.  Whether I “like” them or not, I just eat them. For me it is a lot like putting one foot in front of the other. I just do whatever the next thing is that needs to be done.

A wise friend told me once that it could be as easy or as hard as I chose to make it, and SUFFERING IS OPTIONAL. So, I am choosing to make this weight release journey as “easy” as possible. I am living in a mindset that  I am going to get rid of this weight and I am NOT going to suffer through it. I am going to get excited about every small victory and I am going to reward myself. And we will talk about rewards in a minute.

So here is where there guilt comes in to play. I know many of you out there from one time or another has “fallen off the wagon”. Or in other words, you have eaten something that you didn’t feel like you should have. When you were done, you began to feel guilty about it, and then you either continued to make unhealthy food choices, or you beat yourself up over it, or maybe you even got a little crazy about it and then decided you were going to wreck yourself by going on a ten mile walk or something to “counteract” the unhealthy choice.

I ask you, why do you feel guilty? The way that I see it is, food is JUST food. And currently for me, many hear me say that food is fuel. BECAUSE IT IS! Food is simply fuel for your bodies. Now you can choose to put fuel in your body that isn’t going to allow you to run as well, or you can choose to put in the premium fuel. The kind of fuel that is going to help you run exceptionally. And with said, sometimes we choose the fuel that we know isn’t going to be the best quality for us, and we choose it anyways. SO WHAT!!!!  It was just ONE CHOICE!

One choice in a series of hundreds of choices that we make throughout the entire day. So, when you choose to make an unhealthy choice and you feel the guilt rising up inside of you, instead of beating yourself up over it, I implore you to say, “that was one choice” and then make a different choice after that. I want you to know that the one unhealthy choice that you made doesn’t define you. Nor does the hundreds of unhealthy choices that you possibly made that got you to where you are today. They are not what makes you the amazing person that you are today. Let me say that again, your unhealthy choices DO NOT DEFINE YOU!!  So drop whatever labels you are carrying around and hold your head up proudly because you are taking action to change your life, one step at a time. Even if the only step is reading this blog, you are doing something, one step at a time. Just keep taking those steps, and I will too.

Here is my final thought, because I want to take a minute to talk about “rewards” and treats. Many people I know feel that they deserve a “treat” from time to time, or everyday…. Or some where in between there. J I would like to tell you first, I think you that you deserve ALL KINDS of rewards and treats! I think you are doing an amazing job, so you should be proud of yourself. So, go out and reward yourself! Let me say this though, YOU ARE NOT A PUPPY!!!! Rewards and treats do not have to look like food! They can be things like getting yourself a pedicure, or a massage, or buying yourself a favorite candle. Or you don’t even have to spend any money it could mean a leisurely walk by the river, or setting aside time for you to sit and read or relax, or just doing something fun that you really wanted to do.

Pedicures are definitely my thing and I thoroughly enjoy getting them! One day soon, I will be treating myself to one, because I most definitely deserve it!  

I hope that if you are struggling with food guilt at all, you can let it go, and know that you are incredibly valuable and you deserve to live your best life ever. I am here for you if you ever need someone to talk to, or to give you a pat on your back because I think you are absolutely amazing!

Leave a comment

Filed under Uncategorized

2nd Workout

Well, good afternoon to you. Angela here. Many of you know me and followed my journey in 2011 when I released 60 pounds of weight with Impact Fitness. Since then a lot has changed in my life.  I have met a wonderful and supportive man who loves me and my kids and we have joined forces to create a crazy and amazing family. Between the two of us we had 7 children, yes I did say seven, and then last summer I got pregnant with our adorable baby boy named Eli. So thats right, we have 8 kids.

Needless to say, some of my working out and staying healthy kind of got put on the back burner. I became a very busy mom with all of my kids, and did I mention that all of the older kids are now teenagers or pre-teens? So after I had Eli I took a look at the scale, and a good hard look at our life and decided that it was time to make some changes. Those 40 pounds that I put back on needed to go away.  And as a family,  I took a look at our meals that we were eating and decided it is time to clean things up.

So here I am. I sat down with Laura and we talked about a BRAND NEW program that Impact Fitness is rolling out. Its called 20 in 6. The goal of it is not only to jump start my metabolism, it is also to shed 20 pounds in 6 weeks. And I couldn’t be more excited. I want you to take you along on my journey with me. Maybe you are in a place where you are feeling stuck about your workouts or maybe you are looking for some motivation to move you a long or to even get you started. Whatever place you are in, I am here for you!

So let me tell you that today was my 2nd workout for 20 in 6. When I went to the gym yesterday for the first time in a year and half not only did I have a ton of anxiety about whether or not I was going to be able to do work out again, I was scared to death about pushing my body. And let me tell you, I was pushed! Everything from my chin down hurts! AND, I got up for more torture today! Another killer work out. But I want to tell you about what I call “2nd workout”. This is the workout you get when you are trying to sit down or stand up when every inch of your body is so incredibly sore. You know what I am talking about, the workout that you get when you have all ready had that hard core workout and now you need to function in real life. For me right now the stairs in my house are killing me, and it takes every ounce of strength to carry my body up and down them, but I know its worth it. The other big thing that is insanely hard is carrying around Eli. He only weighs 14 pounds, but he may as well weigh a hundred! And sitting down to pee, well you may as well forget about that! And what makes this second workout even more exciting…. I have been drinking about a gallon and a half of water a day.. so guess what, yep, I have to pee even more! That’s why its called “2nd workout”. It is the workout AFTER the workout.

What I do know and am completely assured of is this WILL get easier! This will also get me to where my goals are. So for now, I will continue to take each day one at a time, and feel grateful for my 2nd workout as I know that it is helping me to take up less space in this world!

I hope that you come along with me on my journey and I hope that you can feel encouraged or even inspired that even when we have setbacks in our life, we can decide to simply move forward and change! We can take control of our lives and choose something different, something better. I do hope that where ever you are in your life, you will take one step in direction of where you would like to be. Think about your life and where you would like to be a year from now. How will you get there? What can you do today, to get to that place. Whatever it is, I support you.

For me, its that 2nd workout…

Leave a comment

Filed under Uncategorized

Crock Pot Baked Beans

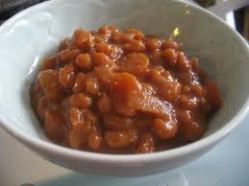
These baked beans are super easy to throw together, just spend a few minutes on the prep and let your slow-cooker do the rest! Give this recipe a try next time you’re asked to bring a dish to pass, you’ll never want to buy the canned ones again!

Image

Ingredients

1 pound (about 214 cups) dried navy beans, sorted and rinse
2 cups yellow onions, diced
34 cup ketchup
14 cup Blackstrap molasses
14 cup light brown sugar, packed
2 tablespoons apple cider vinegar
1 tablespoons chili powder
1 tablespoons nutritional yeast flakes
2 teaspoon dry mustard, or 2 tablespoons
spicy brown or Dijon mustard
4 cups water
Sea salt
Freshly ground black pepper
Hot pepper sauce (optional)

Directions

Place beans in a large pot, and cover with water. Bring to a boil over high heat, and boil for 2 minutes. Cover, remove from heat, and set aside to soak for 1 hour. Drain beans in a colander, and discard soaking liquid.

In a medium or large slow cooker, combine yellow onions, pre-soaked navy beans, ketchup, blackstrap molasses, light brown sugar, apple cider vinegar, chili powder, nutritional yeast flakes, and dry mustard. Pour in water.

Cover and cook on low for 7 or 8 hours or until beans are tender.

Taste and season with sea salt, black pepper, and hot pepper sauce.

Makes about 16 half cup servings.

Nutritional Information (per 1/2) cup

calories: 75

total fat: .2 grams

sodium: 73 mg

carbs: 18 grams

fiber: 3 grams

sugar: 9 grams

Protein: 2.6 grams

Leave a comment

Filed under Uncategorized

Garlic and Onion Soup

Let’s talk about the weather for a little bit. Not too long, though, it hasn’t been great enough to deserve a lot of praise. I’m talking about all the rain we’ve gotten in my area. It seems like every other day it’s raining, pouring and thunder-storming. Doesn’t exactly make for the greatest grilling out weather, does it? Hopefully we’ll get a lot more nice and sunny days that are perfect for firing up the grill, but until then, with all this rainy weather, I’ve been craving soup! Yeah, I know, not what everyone thinks about eating in the summertime, but I find it comforting on dreary days like these.


Image

Ingredients

2 teaspoons olive oil
5 tablespoons minced garlic
1 medium-large onion, sliced thinly
1 teaspoon sweet smoked paprika
3 cups vegetable broth
1 cup water
1/4 teaspoon salt
1/4 teaspoon freshly ground black pepper
2 (1-ounce) slices rustic bread, cut into 1-inch cubes
8 large eggs
2 tablespoons chopped fresh flat-leaf parsley

Directions

Preheat broiler.
Heat oil in a large saucepan over medium heat. Add garlic and onion to pan; cook 5 minutes or until tender (do not brown). Stir in paprika. Add broth, 1 cup water, salt, and pepper; bring to a boil. Reduce heat, and simmer 10 minutes.
Arrange bread cubes in a single layer on a baking sheet; broil 4 minutes or until golden, stirring once. Reduce temperature to 350°.
Place about 1/4 cup bread cubes in each of 8 ovenproof soup bowls. Break one egg into each bowl; ladle about 1/2 cup broth mixture into each bowl. Arrange bowls on a baking sheet; bake at 350° for 20 minutes or until egg whites are set but yolks are still runny. Garnish with parsley.

Nutritional Information

Amount per serving (serves 8)

Calories: 114
Calories from fat: 41%
Fat: 5.2g
Saturated fat: 1.3g
Monounsaturated fat: 2.7g
Polyunsaturated fat: 0.9g
Protein: 7.3g
Carbohydrate: 7.6g
Fiber: 0.3g
Cholesterol: 180mg
Iron: 1.3mg
Sodium: 398mg
Calcium: 38mg

Leave a comment

Filed under Uncategorized

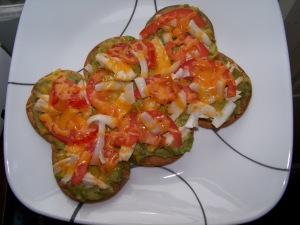
Avocado and Chicken Pizza

103_1514

Ingredients

Tortillas (like La Tortilla Factory Smart and Delicious tortillas that are lower in carbs and calories and higher in fiber)

Avacado Spread (recipe below) (2 cups)

Chicken, cooked and cut into 1″ chunks, or pulled apart

Pizza Toppings, such as:

red onion, diced

tomatoes, diced

cilantro

reduced fat cheddar cheese

avocado, cut into 1″ pieces

Directions

Preheat oven to 400F. Place tortillas on a baking sheet and bake them for about 5-8 minutes (turning over halfway through), just enough to crisp them up a bit so you have a nice, crispy crust instead of a soggy, droopy crust. Be sure to keep an eye on them, you don’t want to burn them but if you don’t crisp them up enough, once the pizzas are loaded with toppings and baked, the crust won’t firm up as much.

Once the tortillas are crisped up a bit, pull them out of the oven and let cool for a few minutes. Spread each tortilla with about 1/2 cup of the avocado spread and sprinkle on toppings. Bake for about 6-8 minutes or until cheese is fully melted.

Nutritional Information, per pizza (makes 4 pizzas)

keep in mind, a lot of the fat in this comes from the avocado spread, which is a “good” fat

Calories: 475

Fat: 29 g

Carbs: 36 g

Sodium: 844 mg

Fiber: 20 g

Protein: 32 g

Sugars: 2 g

Avocado Spread

2 avocados

1 small onion, chopped finely

1 lime, juiced

2 tsp. garlic

1/2 tsp. salt

Cut the avocados in half, take out the pit and scoop the avocado out of the shells and into a medium sized bowl. Add remaining ingredients and mash thoroughly with a potato masher. Set aside. Makes about 2 cups.

Nutritional Information, per serving

(for 1/2 cup avocado spread, makes about 4 servings)

Calories: 156

Fat: 13 g

Protein: 2 g

Sugars: .4 g

Fiber: 6 g

Carbs: 10 g

Leave a comment

Filed under Poultry

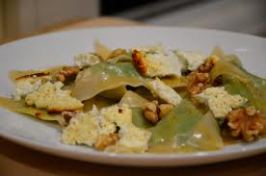
Pea and Edamame Ravioli with Toasted Walnuts and Ricotta

Image


Pea and Edamame Filling

1 16oz. package frozen peas
1 12oz. package frozen, shelled edamame
1 tablespoon olive oil
4 cloves of garlic, thinly sliced
2 tablespoons lemon juice
1 to 2 tsp. freshly cracked pepper
freshly ground salt, to taste

Bring a large pot of water to a boil and cook the peas and edamame for about 5 minutes. Drain, reserving some of the cooking water. Transfer to a food processor, and puree, adding water if needed to reach a creamy consistency.

Meanwhile, heat olive oil in a small skillet and cook the garlic until lightly browned and tender. Fold into pureed peas along with the lemon, pepper, salt

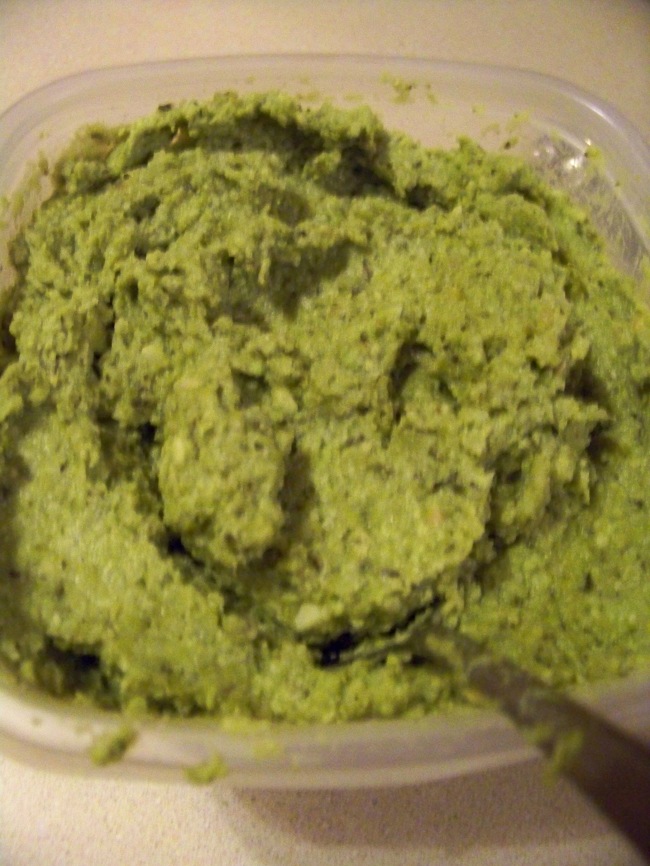
Image

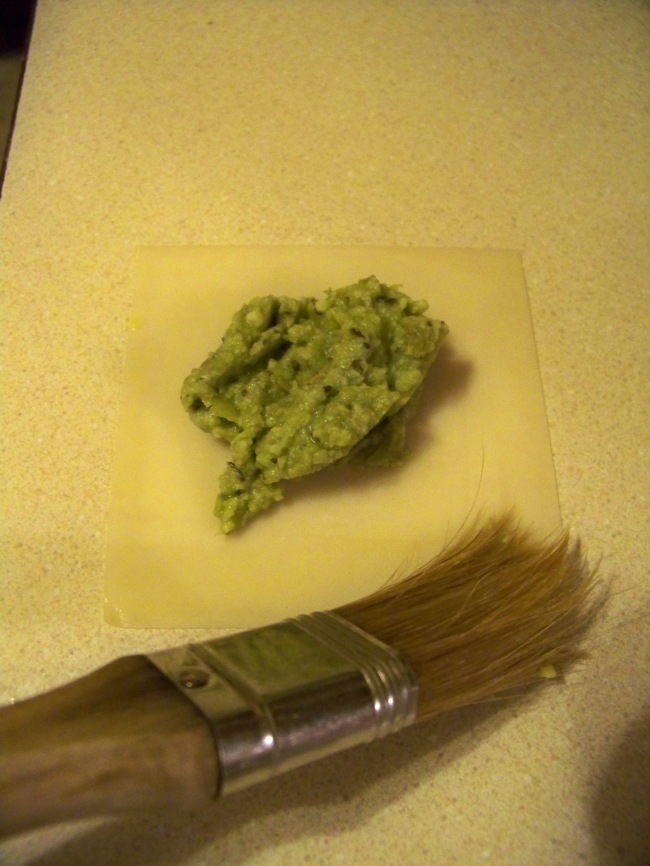
this is what the pea and edamame mixture will look like when done

Now to make the Ravioli

Pea & Edamame filling
wonton wrappers
ricotta cheese, drained for a few hours
butter, about 1 tablespoon per serving
chicken broth, about 1/2 cup per serving
walnuts, lightly toasted

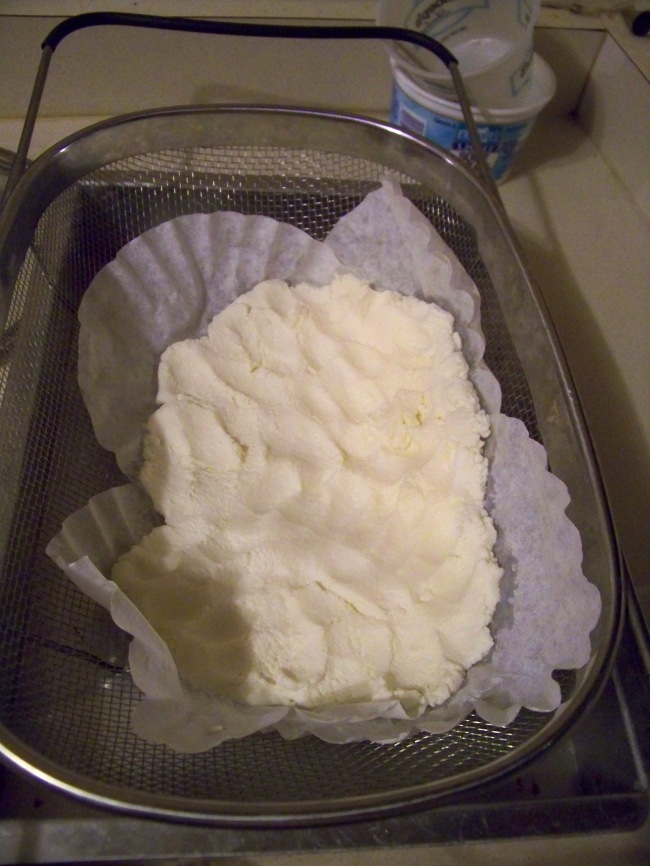
Image

here I have the ricotta draining in the strainer. My strainer wasn’t as fine sieve as I wanted so I put down a few coffee filters (you could also use cheese cloth if you have it handy, which I didn’t)

Image

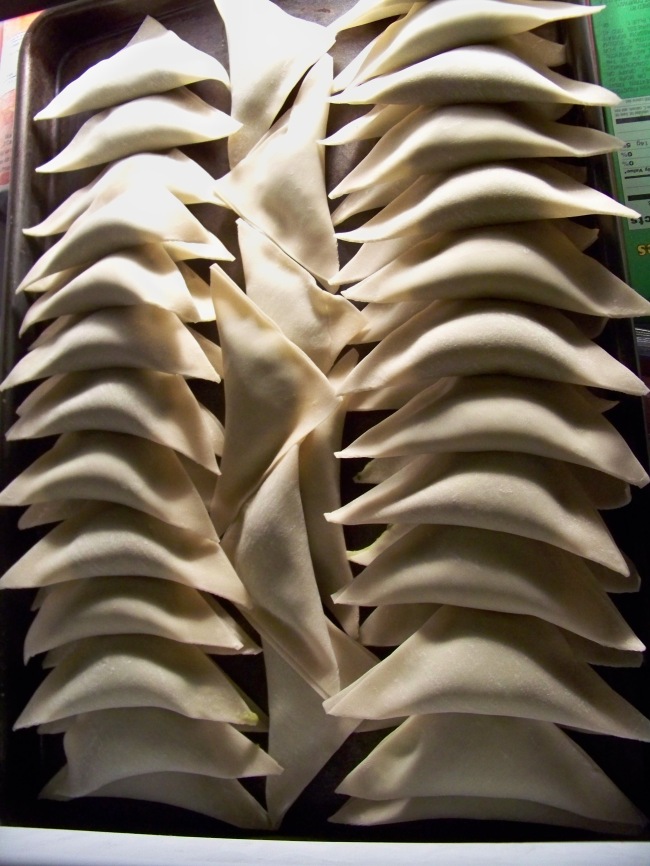
if you’re not going to use all of the raviolis right away, lay them flat on a sheet pan and freeze them. Once they’re frozen you can put them in a container and pull them out of the freezer as needed!

Directions

Prepare the raviolis by putting a small amount of the pea and edamame filling onto each wonton wrapper. Wet the edges and press together into a triangle. Set aside.

Image

Preheat oven to 400ºF. Place a sheet of foil on a baking sheet and spray with nonstick cooking spray. Transfer the ricotta the baking sheet, spreading it out. Spray with olive oil spray and sprinkle on a little bit of salt and pepper, to taste. Bake for about 15 minutes, until lightly browned, and set aside.

Meanwhile, bring a pot of water to a boil, and heat the butter in a large skillet over medium heat. Cook the ravioli until tender, about 5 minutes. Let the butter brown slightly (DON’T BURN IT!) Add the chicken broth, bring to a boil and simmer for a few minutes. Remove the ravioli from the water and add to skillet with the browned butter sauce; stir and saute briefly.

Serve ravioli with crumbled ricotta cheese over and toasted walnuts.

Leave a comment

Filed under Uncategorized

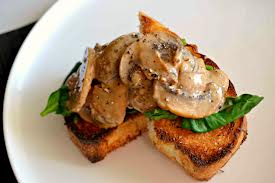
Creamed Mushrooms over Toast

I know a lot of people that have been out mushroom hunting lately, specifically for Morel Mushrooms. If you happen to hunt for them like my family does, you end up with so many of them that you run out of ideas on how to use them all up! I found a great recipe to use them in and it’s reminiscent of my childhood (we used to eat creamed beef on toast) which makes it even more enjoyable to eat!

creamed mushroom toast

Ingredients

Creamy Sauce

1 tablespoon extra-virgin olive oil (or Grapeseed oil)
1 cup finely chopped onion (yellow or white)
2/3 cup white rice (or quinoa)
5 cups reduced-sodium chicken broth or vegetable broth
1 cup dry white wine
1/4 teaspoon salt, or more to taste
Freshly ground pepper, preferably white

Mushroom Toasts

1 ounce dried mushrooms
1 cup warm water
16 1/4-inch-thick slices baguette  (whole-wheat)
2 teaspoons extra-virgin olive oil plus 2 tablespoons, divided (or Grapeseed oil)
1/4 teaspoon salt plus 1/8 teaspoon, divided
Freshly ground pepper to taste
12 ounces fresh wild mushrooms, such as morels, cleaned
3 tablespoons minced green onion
1 cup Creamy Sauce
2 teaspoons Dijon mustard
1 tablespoon dry sherry, or to taste
Fresh basil

Directions

  1. Preheat oven to 400F.
  2. To make cream sauce: Heat 1 tablespoon oil in a large saucepan over medium heat. Add onion and cook, stirring, until soft but not browned, about 5 minutes. Add rice and cook, stirring, about 2 minutes. Add broth and wine and bring to a boil. Cover and simmer until the rice is very soft and the liquid is greatly reduced, about 25 minutes. Cool slightly.
  3. Transfer the mixture to a blender and puree, in batches if necessary, until smooth (or you could puree in the pot with an immersion blender if you have one…if not, consider picking one up, they’re handy for times like these). The consistency should be similar to a pourable sauce; add more broth or water as needed. Season with 1/4 teaspoon salt and pepper (use white pepper if you have it).
  4. Place dried mushrooms in a bowl and add warm water and let soak for about 20 minutes to re-hydrate.
  5. Meanwhile, brush baguette slices with 2 teaspoons oil and season with 1/4 teaspoon salt and pepper to taste. Place on a baking sheet and toast in the oven until lightly browned, 6 to 8 minutes. Set aside on the baking sheet until ready to serve.
  6. Cut fresh mushrooms into 1-inch pieces. Line a strainer with a paper towel, place over a bowl and strain the dried mushrooms; reserve the liquid. Squeeze the (re-hydrated) dried mushrooms to remove excess water, then chop into 1/2-inch pieces.
  7. Heat the remaining 2 tablespoons oil in a large skillet over medium heat. Add green onion and cook, stirring, for 1 minute. Add all the mushrooms and cook, stirring, until they begin to brown and the moisture has evaporated, about 5 minutes. (Add a few tablespoons of the mushroom-soaking liquid if the mushrooms start sticking.) Transfer the mushrooms to a bowl. Add 1/2 cup of the reserved soaking liquid, 1 cup of the Cream Sauce, mustard and sherry to the pan. Heat, stirring, just until the mixture starts to bubble. Return the mushrooms to the pan, season with the remaining 1/8 teaspoon salt and pepper to taste and gently stir until heated through.
  8. To serve, top each toast with about 2 1/2 tablespoons of the mushroom mixture and garnish with basil, if desired.

Nutritional Information

per serving (makes 8 servings, 2 toasts with sauce per serving)

171 calories

6 g fat ( 1 g sat , 4 g mono )

0 mg cholesterol

26 g carbohydrates

1 g added sugars

5 g protein

2 g fiber

413 mg sodium

Leave a comment

Filed under Vegetables and Vegetarian Dishes

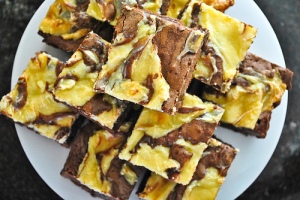
Swirled Cheesecake Brownies

Some “healthier” recipes just don’t taste as delectably satisfying if you forgo too many of the ingredients that make it delectable. This brownie recipe is a great combination of a healthier AND sweetly satisfying. With all things, though, enjoy in moderation. Make sure you cut these into the 24 bars as suggested in the recipe so you don’t end up eating more calories and fat than you think you are. Enjoy one with a nice glass of low fat (or almond) milk to help fill you up and keep you from over-indulging! You can also freeze some if you’re making the entire batch for only a couple people and don’t want them to go to waste.

cheesecake brownies

Cheesecake topping

4 ounces reduced-fat cream cheese
1/4 cup sugar
1 large egg
1 tablespoon all-purpose flour
1 tablespoon nonfat plain yogurt
1/2 teaspoon vanilla extract

Brownie layer

2/3 cup whole-wheat pastry flour
1/2 cup unsweetened cocoa powder
1/4 teaspoon salt
1 large egg
2 large egg whites
1 1/4 cups packed light brown sugar
1/4 cup canola oil
1/4 cup strong (or prepared instant) coffee
2 teaspoons vanilla extract

Directions

Preheat oven to 350° F. Coat a 7-by-11-inch baking pan with cooking spray.
Topping: Place cream cheese in a small mixing bowl and beat with an electric mixer until smooth and creamy. Add sugar and beat until smooth. Add egg, flour, yogurt and vanilla; beat until well blended.
Brownie layer: Whisk whole-wheat flour, cocoa and salt in a bowl. Place egg, egg whites and brown sugar in a large bowl and beat with the electric mixer on medium speed until smooth. Add oil, coffee and vanilla; beat until well blended. Add the dry ingredients and beat on low speed just until well blended, stopping once to scrape down the sides.
Scrape half of the brownie batter into the pan. Slowly pour the topping evenly on top. Drop the remaining brownie batter in large dollops over the topping. Draw the tip of a sharp knife through the two batters to swirl the batters together.
Bake the brownies until the top is just firm to the touch, about 20 minutes. Let cool completely and cut into 24 bars.

Nutritional Information

per bar (makes 24 bars)

105 calories

4 g fat

21 mg cholesterol

16 g carbohydrates

2 g protein

1 g fiber

54 mg sodium

Leave a comment

Filed under Dessert

Mini Brussels Sprout and Potato Fritata

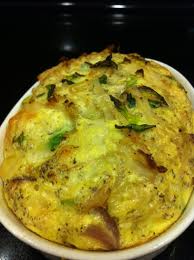
brussel sprout and potato fritata


Once again I had some random ingredient in my fridge that I was not quite sure what to do with. This time it was Brussels Sprouts. This was a delicious way to make them but I think next time I will try making them as just a nice healthy veggie side dish, instead of the main dish. Feel free to use frozen pre-shredded potatoes like the recipe suggests; however, I had potatoes to use up at home so I shredded them myself and used 1 cup white potato and 1 cup sweet potato.


Ingredients

1 tablespoon extra-virgin olive oil
2 cups refrigerated shredded potatoes
8 ounces Brussels sprouts, trimmed and thinly sliced (about 2 cups)
1/2 cup chopped onion
2 cloves garlic, minced
1 16-ounce container liquid egg substitute (or 16 oz. egg whites)
1/3 cup grated Parmesan cheese
1/4 cup low-fat milk
1 teaspoon dried thyme
1/2 teaspoon salt
1/2 teaspoon freshly ground pepper

Directions

Preheat oven to 400°F. Coat four 10-ounce ovenproof ramekins with cooking spray and place on a baking sheet (or use a muffin tin).
Heat oil in a large nonstick skillet over medium-high heat. Add potatoes, Brussels sprouts, onion and garlic and cook, stirring, until softened and starting to brown, about 6 minutes. Divide the mixture among the prepared ramekins.
Whisk egg substitute, cheese, milk, thyme, salt and pepper in a medium bowl. Pour the egg mixture over the potato mixture and gently stir to combine.
Transfer the baking sheet to the oven. Bake until the eggs are set, about 25 minutes.

Nutritional Information

209 calories

6 g fat ( 2 g sat , 3 g mono )

7 mg cholesterol

21 g carbohydrates

18 g protein

3 g fiber

665 mg sodium

Leave a comment

Filed under Vegetables and Vegetarian Dishes

Steak and Potato Kebabs

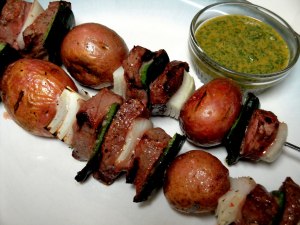
steak and potato kebabs

Did someone say KEBABS? Oh, heck yes…I did! I Looove kebabs. They are so convenient for me because I can just get everything all cut up and put into containers and in the fridge ahead of time. Then, when it’s time, I usually put out all the containers with the different ingredients, along with skewers (if you’re using wooden skewers make sure you soak them in water first so they don’t catch fire on the grill) out for everyone to choose what they’d like on theirs. I like to  add more to mine ( like broccoli and cauliflower. If you like to add tomatoes, which I do, make sure you add them only for the last minute or two or they’ll get shriveled or burnt!), but feel free to do with yours what you wish!

Ingredients

1/2 cup packed fresh cilantro leaves, minced
2 tablespoons red-wine or cider vinegar
2 tablespoons reduced-fat sour cream
1 tsp. garlic, minced
1 teaspoon chile powder
1/2 teaspoon ground cumin
1/2 teaspoon salt, divided
8 new or baby red potatoes
1 1/4 pounds strip steak, trimmed and cut into 1 1/2-inch pieces
1 large green bell pepper, cut into 1-inch pieces
1 teaspoon extra-virgin olive oil
1 large sweet onion, cut into 1-inch chunks

Directions

Combine cilantro, vinegar, sour cream, garlic, chile powder, cumin and 1/4 teaspoon salt in a small bowl. Set aside.  Preheat grill to high.
Place potatoes in a microwave-safe container. Cover and microwave on High until just tender when pierced with a fork about 3 to 3 1/2 minutes.
Toss the potatoes, steak and pepper pieces with oil and the remaining 1/4 teaspoon salt in a large bowl. Thread the potatoes, steak, peppers and onion chunks onto 8 skewers. Grill, turning once or twice, until the steak reaches desired doneness (about 6 minutes for medium). Serve kebabs with the reserved sauce.

Nutritional Information

271 calories

9 g fat

65 mg cholesterol

17 g carbohydrates

30 g protein

2 g fiber

368 mg sodium

Leave a comment

Filed under Red Meat